How to Install LED Light Strips

LED light strips are an excellent way to add personality and colour to your space. They are versatile and easy to install. Be it at your home, office, or retail shop, LED light strips can enhance the ambience and create an eye-catching display. With this step-by-step guide on how to install LED light strips, you too can elevate your space with minimum effort.
How to Install LED Light Strips?
Installing LED light strips can instantly transform your space. Follow these detailed steps to ensure a seamless installation process:
-
Step 1: Measuring and purchasing your lights
Carefully measure the areas where you intend to install the strips, considering corners and other spaces. With this measurement in hand, purchase the LED light strips while ensuring you have enough length to cover the entire space. When selecting LED light strips, take note of the colour temperature, brightness, and any additional features you want. Make sure that the LED light strips align with your aesthetic preferences and practical requirements.
-
Step 2: Cleaning and preparing the installation surface
Begin by thoroughly cleaning the installation area. Remove any dust, dirt, or debris from the surface using a gentle cleaning solution. Once cleaned, ensure the surface is completely dry before proceeding. Moisture can compromise the adhesive, affecting its ability to securely bond with the installation surface. Take the time to inspect the area and address any imperfections that might hinder adhesion.
-
Step 3: Peeling the adhesive backing
Peel the backing of the adhesive strip. Begin by identifying the starting point of your LED light strip, usually indicated by a designated marker, or cut line. Gently peel back a small portion of the adhesive backing, exposing the sticky side of the strip. Be careful and avoid touching the adhesive with your fingers, as oils from your skin can reduce its effectiveness.
-
Step 4: Affixing the strip lights to the surface
Now, it is time to firmly apply the strips to the surface. Take your time and press the adhesive side of the strip against the cleaned and dry area. Ensure that the strip aligns with your measurements and desired layout. As you go along, continue to peel off more backing and stick it on the surface. Smooth out the strip as you proceed, minimising any air bubbles or wrinkles that may appear.
-
Step 5: Trimming the excess strip lighting
After covering the entire designated area with the LED light strips, you may find yourself with a bit of excess. Fear not! All you need is a pair of regular household scissors. Carefully clip off the surplus strip lighting at the designated cut lines. You will find these lines present between the copper points on the LED strip.
-
Step 6: Plugging in the LED strips and hanging the controller
With the LED light strips securely in place, it is time to turn them on. Locate the appropriate power source and plug in the LED strips. You will need an LED strip light driver to connect that connects the socket to the strip light. The LED driver converts domestic alternating current (AC) to direct current (DC). Confirm that the connection is snug and secure. A loose connection can lead to flickering or affect the light’s functionality. Once plugged in, take a moment to check the initial glow of your LED light strips. If your LED strip lights come with a controller, check its functions. A controller allows you to customise colours, brightness, and dynamic lighting effects.
How To Attach LED Strip Lights Together?
Although LED strip lights are easy to apply, you may find yourself in a situation where sticking them on a surface is challenging. Or you might want to extend lights to other surfaces to enhance their appearance. This is where you will need to use connectors to link different LED strip lights together. Connectors play a crucial role in maintaining the electrical continuity between strips, allowing them to function as a single unit. Follow these steps to learn how to attach LED strip lights together.
-
Step 1: Identify the appropriate connector
Begin by examining your LED light strips and identifying the type of connectors you need. Some common types include pin connectors, solderless connectors, or specialised connectors designed for certain strip models.
-
Step 2: Prepare the light strips
Before connecting, make sure your LED light strips are clean and free from any dust or debris. This ensures a secure and reliable connection.
-
Step 3: Select a suitable location
Choose a location where you want to connect the LED light strips. Consider factors such as the desired lighting pattern and accessibility for installation.
-
Step 4: Connect the strips to the connector
Gently attach the end of one LED light strip to the connector. Ensure a tight fit to guarantee a stable connection. If your connector has a specific polarity, make sure to match it with the strip's polarity.
-
Step 5: Align connectors correctly
Take your time to align the connectors properly. Misalignment can lead to connection issues or disruptions in the lighting flow. Double-check that the connectors are securely in place.
-
Step 6: Secure the connection
Once the LED light strip is connected to the connector, secure it in place. This may involve tightening screws, snapping clasps, or using other securing mechanisms depending on the type of connector used.
-
Step 7: Repeat for additional strips
If you have more LED light strips to connect, repeat the process for each additional strip. Ensure a seamless transition between strips by aligning connectors accurately.
-
Step 8: Test the connection
Before completing the installation, test the connection by powering on the LED light strips. Confirm that all strips are lighting up as expected and that there are no dark spots or interruptions.
Using LED Diffusion Cover For Enhanced Aesthetics
If your LED light strips are visible and you want to create a diffused and evenly distributed glow, consider installing an LED diffusion cover. These covers are designed to soften the light output, reducing harsh contrasts, and creating a more ambient illumination. This simple addition will enhance the visual appeal of the lighting and make your living space more comfortable and inviting. Here are the steps you need to follow to install LED diffusion covers:
-
Step 1: Prepare the LED light strip and diffusion cover
Before you begin, make sure you have your LED light strip and diffusion cover ready. You can use an aluminium profile as a diffused reflector as well. Lay them out on a clean and flat surface for easy handling.
-
Step 2: Identify wire colours
Take a moment to identify the wire colours on the diffusion cover and the corresponding colours on the LED light strip. This step is crucial for ensuring a proper match and achieving the desired visual effect.
-
Step 3: Align wires carefully
With the wire colours identified, align the wires of the diffusion cover with their corresponding colours on the LED light strip. Take your time to ensure a precise alignment, as this will contribute to a seamless and visually appealing result.
-
Step 4: Check for proper fit
After sliding the diffusion cover into place, double-check to ensure that it fits snugly over the LED light strip. Confirm that the alignment is still intact and that there are no gaps or uneven sections. This attention to detail will enhance the overall quality of the lighting installation.
Things You Should Know About LED Light Strips
When purchasing LED light strips, there are certain technical aspects you should know. They can greatly impact your selection and overall satisfaction with the illumination they provide.
-
LED Strip Light Density
When you go on to buy LED light strips, you will encounter terms like 2835, 3528, 5050, or 5730 denoting various LED emitter types. These numbers represent the LED density of the LED strip lights. Density is determined by the number of LEDs affixed per foot or metre. A higher density, like 36 LEDs per foot (120 LEDs per meter), ensures a more evenly distributed lighting effect. Consider LED density when comparing prices, as it significantly impacts the quality of illumination.
-
Colour Range
LED light strips offer a versatile colour range, allowing you to customise your lighting ambience. The options include RGB (Red, Green, Blue) for dynamic colour changes, multicolour for a diverse setting, and white and neutral colours for a clean, uniform glow. The colour range you choose depends on your aesthetic preferences and the desired atmosphere in your space.
-
LED Strip Light Wattage
Understanding LED strip light wattage is crucial for both functionality and energy efficiency. The wattage indicates the power consumption of the LED strip. Higher wattage means brighter illumination, but it also corresponds to increased power consumption. Consider your specific lighting needs and energy efficiency goals when selecting LED strips with an appropriate wattage.
-
LED Strip Light Length
LED strip light length is a fundamental consideration to ensure the strips adequately cover your intended space. Measure the areas where you plan to install the strips and choose a length that accommodates your layout. It is essential to plan for connectors and extensions if needed for seamless connections.
Takeaway
Adding LED light strips to your space is a great way to enhance its ambience and express your personal style. With Crompton's LED strip light range, you have a variety of colour options to choose from, making it easy to find the perfect match for your taste and needs. Also, these lights come in three variant: 60 LEDs/metre, 120 LEDs/metre and 240 LEDs/metre. Moreover, with features like a 2-year warranty, no UV, and BIS registration, you can be confident in the quality and safety of your purchase. By following our simple steps, you can install your LED light strips with ease and enjoy a vibrant and colourful space in no time. Start exploring LED light strips with Crompton today!
Transform your living spaces with brilliance and energy efficiency using Crompton's LED lighting solutions.
FAQs On How Do You Install LED Strip Lights
-
Are LED strip lights easy to install?
Yes, LED strip lights are generally easy to install, even for individuals without extensive technical expertise. Most LED strips come with adhesive backing for straightforward attachment to various surfaces.
-
Where can I apply LED strip lights?
LED strip lights can be applied to almost any surface that is clean, dry, and compatible with adhesives. Common applications include:
- Under cabinets to illuminate kitchen countertops for enhanced visibility
- Around mirrors for a touch of glamour to your bathroom or vanity area
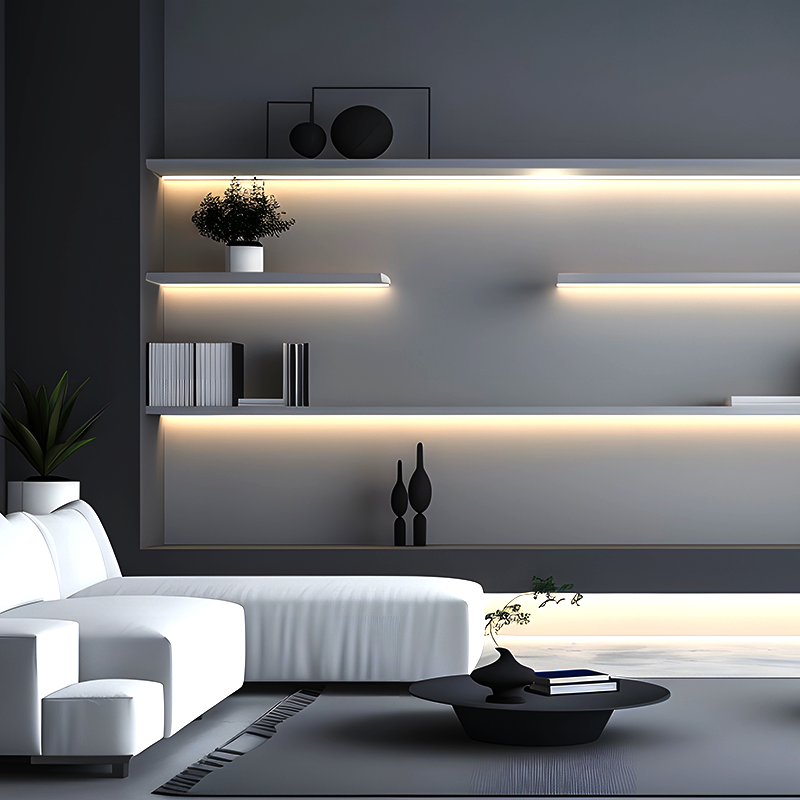
- In living rooms to create ambient lighting along shelves or entertainment units
- Behind furniture to highlight the contours of your furniture for a stylish look
- Under stairs to illuminate staircases for both safety and aesthetics
- As cove lighting in ceilings
-
Can I cut LED strip lights?
-
How do I install LED strips on the ceiling?
Installing LED strips on the ceiling follows a similar process as on other surfaces:
- Determine the length needed and plan the layout.
- Ensure the ceiling is clean and dry.
- Peel off the backing and attach the LED strip to the ceiling.
- If necessary, use clips or adhesive clips to secure the strip along the ceiling.